
Most of you want to send there own HTTP commands (GET, PUT, POST, DELETE…) like you can do with cURL. It’s also possible with Printoid.
Please read first these two tutorials, because you will probably find here a lot of useful informations before trying to create your own HTTP commands, as for example how to add custom commands in Printoid and how to use them:
- How to send your custom GCODE commands with Printoid
- How to send commands to your Raspberry Pi over SSH with Printoid
CREATE A COMMAND |
The custom command panel is only available in Printoid PRO and PREMIUM. You can access it from the left menu.
Then, simply click on the “+” button, as the last element of the command list.
I will not describe here how the HTTP command will work, but only what you need to provide to Printoid for your first cURL-like command. Please refer to this tutorial or this one for more informations about the command editor.
Here is the command editor when “HTTP” is selected as the “Type” :
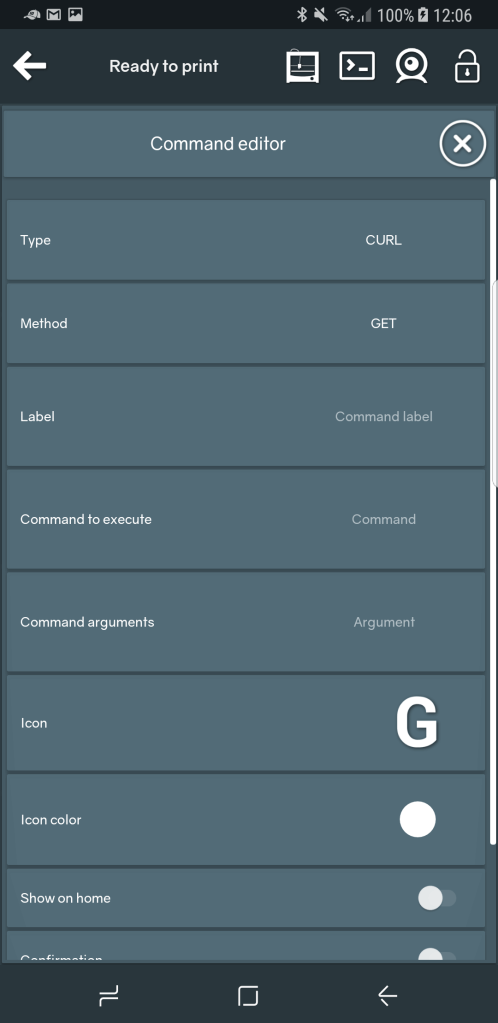
- Type: please select “HTTP” to create your own HTTP command
- Method: please select the HTTP method (GET, PUT, PUSH, or DELETE)
- Label: simply give a custom name to this new command (for display only)
- Command to execute: one of the most important part, please read the section below
- Command body: the second most important part, please read the section below
- Icon: select an icon for this command (for display only)
- Icon color: colorize the icon (for display only)
- Show on home: select up to 4 custom commands to be displayed on the main interface
- Confirmation: should this command be protected by a dialog before sending it
1. Command to execute
The command to execute is the path of the webservice you want to access with this HTTP command.
It should looks like, as for example:
- api/plugin/psucontrol (simple path)
- control/enable-psu (simple path)
- commands?enable=relay1 (path + argument)
- …
Why you should only provide the path of your webservice? Simply because Printoid will automatically add the correct IP above.
For example, if your complete HTTP command is http://192.168.1.30/api/plugin/psucontrol, then Printoid only needs the path api/plugin/psucontrol to build itself the full URL, by selecting the correct scheme (http or https if needed) and the right IP address or hostname (according your connection type for example).
2. Command body
In case of a PUT, PUSH or DELETE method, you probably need to pass some arguments with the webservice call.
In case of a GET command, the arguments are totally ignored.
You need to pass the argments as a JSON formatted string. This string should look like, as for example:
{ “key1″:”string value 1”, “key2”:1234, “key3”:true }
Please note that:
- The arguments should start with a { and end with a }
- Each key should be placed between quotes ( ” ” )
- Each string value should be placed between quotes ( ” ” )
- Numbers and booleans values should be placed without quotes
- A key and its value should be separated by a semicolon ( : )
- Groups of key/value should be separated by commas
- You can add as many groups of key/value as you need.
You can learn more about the JSON data interchange language on Wikipedia for example.
A mis-formatted argument will result on a failing command.
SAVE AND USE |
When you will send a HTTP/GET command, Printoid will display you the body of the result inside an alert dialog.
When you will send a HTTP/PUT, HTTP/PUSH or HTTP/DELETE, Printoid will display you the body of the result if it exists inside a dialog, otherwise it will simply notify you about the success from a toast.

5 thoughts on “Send your own HTTP commands with Printoid”