INSTALL AND CONFIGURE |
Welcome in the official tutorials! You’ve probably found Printoid on Google Play, Twitter, Facebook… And you want to give it a try! Printoid is a powerful remote interface for your OctoPrint server(s). Here are all the prerequisites. Please read carefully the following tutorials before downloading it from Google Play.
Learn more →

Installation
Printoid is a remote interface which communicates with your OctoPrint server, itself connected to your 3D printer over USB for example. Please read this tutorial to understand how the app works and how to install OctoPrint on a Raspberry Pi.
Read the tutorial →
Connecting OctoPrint with Printoid
Printoid is really easy to use and to configure for the first time. The connection to OctoPrint requests you to provide a few parameters. But, of course, Printoid can’t do all the magik. You need to ensure first that your OctoPrint server is properly installed, configured, and reachable from a web browser first.
Read the tutorial →
Access OctoPrint over the Internet
A lot of you want to use OctoPrint outside of their local network (i.e. from the Internet, by using a smartphone connected to the cellular network for example). Fortunately, this is possible. I explain you how to do that.
Read the tutorial →
Adjusting the settings
The settings of Printoid offers you a complete set of adjustable parameters. That’s the best way to enhance your experience with Printoid. Don’t hesitate to read the following topic because a lot of exclusive features can be activated from the different settings panel!
Read the tutorial →
DISCOVER THE FEATURES |
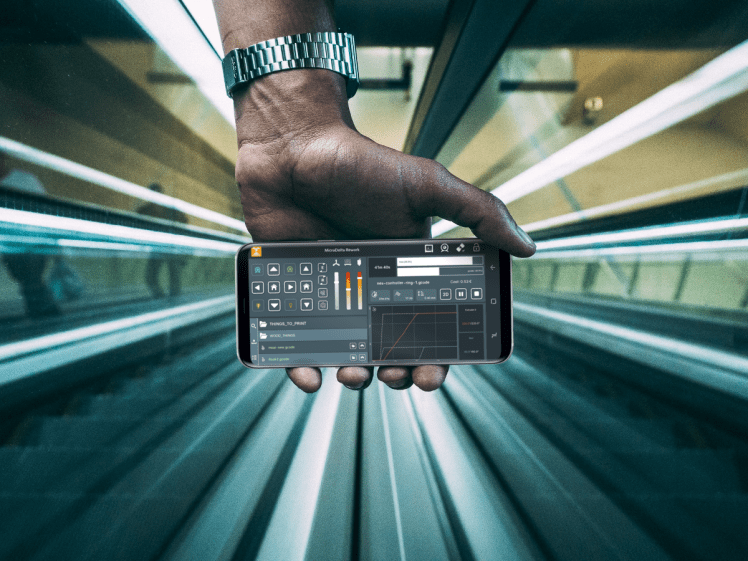
Printoid is a all-in-one interface for your 3D printers. That’s why the main panel is made by four cards: the current job progress, the tools controls, the temperatures and the files manager. Beside that, Printoid offers you a lot of extra features.
Discover the features →
VIDEO STREAMING |
Since the beginning of the project, Printoid embeds a major & exclusive feature : the in-app video streaming 🎥. This feature is available for the PRO and PREMIUM users only. Here are the tutorials to understand how much this feature is powerful and how to use it.
Learn more →

Configuring the video streaming
If you have install a camera on your Raspberry Pi (the official Pi camera, or any compatible USB webcam) and if you’ve properly followed by the book the installation tutorial of OctoPrint on Raspbian (or simply installed OctoPi instead), then… you’ve nothing more to do.
Read the tutorial →
Start camera in low or high quality
Sometimes you need to have the best quality possible for your timelapses for example. Other times, you need a lowest quality because you have a poor WiFi connection on your phone. Here is a tutorial to understand how it is possible to switch between low and high quality profiles.
Read the tutorial →
Support 2 cameras in Printoid
Yes, it is possible. And Printoid natively handles up to 2 cameras feeds at once if you want! This is not an easy tweek but, if you refer properly to my instructions, you will achieve that with success!
Read the tutorial →
See my camera feed from the floating icon
Another exclusive feature of Printoid: a floating icon accompanying you everwhere on your phone, and allowing you to see your camera feed from anywhere, in any other application!
Read the tutorial →
See my camera by using the Android Tiles
Last but not least, and again another exclusive feature in Printoid: the dedicated Android Tiles to see your camera from anywhere and take snapshots in a few clicks. Again, easy to configure, easy to use. Can replace the floating icon if you think that it is annoying.
Read the tutorial →
VIDEO STREAMING |
Since the beginning of the project, Printoid embeds a major & exclusive feature, that can’t be found in any other app for OctoPrint: the ability to create your own powerful commands in a dedicated panel. This feature is available for the PRO and PREMIUM users only. Here are the tutorials to understand what are user commands in Printoid, and how to use them.
Learn more →

Custom GCODE commands
You can create and send your own GCODE commands to your 3D printer(s) over OctoPrint.
Read the tutorial →
Custom SSH commands
You can create and send your own SSH commands to your Raspberry Pi (or any other OctoPrint host machine such as a PC for example). SSH commands are useful if you have to communicate with the OS in your Raspberry Pi and wants to execute system commands, such as switching ON/OFF the GPIO ports, reboot the Pi, restart OctoPrint, perfom system or server updates… or whatever you can do over any other SSH client.
Read the tutorial →
Custom HTTP commands
You can create and send your own HTTP commands to a server on your Raspberry Pi. HTTP commands can be sent using cURL from a laptop to communicate with a server via webservices for example. Best example is the PSU plugin in OctoPrint, that provided APIs to modify the PSU state.
Read the tutorial →
Custom System commands
You can create and send your own OctoPrint’s built-in commands you’ve defined in config.yaml on your Raspberry Pi. These system commands are directly executed by OctoPrint, that way you can for example request OctoPrint to execute a script to switch ON/OFF the GPIO ports, without having to SSH your Raspberry Pi. That’s a pretty good alternative to the SSH commands because the System commands don’t need to have the Username & Password configured in Printoid.
Read the tutorial →
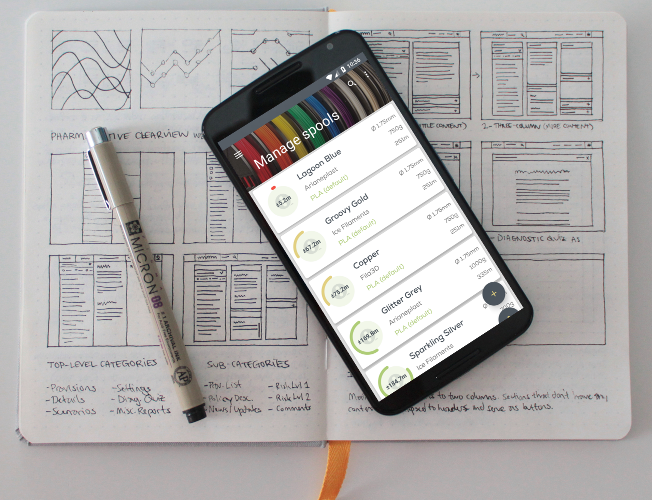
FILAMENT SPOOL MANAGER |
The Filament Spool Manager module integration is an exclusive feature of the Pro and Premium versions.
It is an external application that allows you to manage your stock of filament. Printoid can connect to this application to make it easy 😉
Learn more →
ADVANCED CONTROLS |
The advanced controls are exclusive features of the Premium version only.
Learn more →
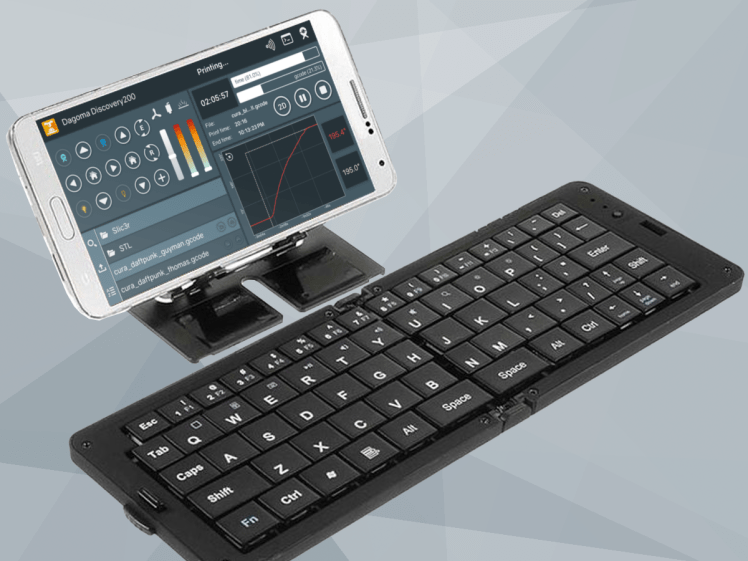
Control Printoid with a keyboard
The Premium version of Printoid can be piloted by using a physical keyboard. This is pretty simple: just plug an USB keyboard (or connect a Bluetooth keyboard) to your device, then open Printoid.
Read the tutorial →
Control Printoid with ADB
The Premium version of Printoid can be piloted by using the Android Debug Bridge (ADB).
Read the tutorial →
BACKUP, RESTORE AND SYNCHRONIZE |
Printoid integrates its own backup & restore feature. It can be local only (using the SDCARD of your device) our from the cloud (using your Printoid Account).
Learn more →
FREQUENTLY ASKED QUESTIONS |
A lot of users questions are already answered here.
Learn more →